Have you ever wanted someone or “something” to automatically send replies to emails you receive?
I thought that might be functionality I wanted, and since I probably can’t get anyone to do this, it had to be “something”.
A lot of hype around ChatGPT at the moment so I thought it could get the task done along with Microsoft Power Platform.
We’ll start with a simple application where you can paste the text from an email and have ChatGPT create a reply. Always possibel to extend the application later if we want to.
To make it a little more interesting, we can ask ChatGPT to give different types of answers. For example, ChatGPT may respond sarcastically, angry, very happy, etc.
Create a new Power App on https://make.powerapp.com, we choose to build a canvas app and select tablet layout.
Power Platform has over 900 connectors to other systems and one of these is to Open AI. So we will use this connector, after all, it greatly simplifies our process of connecting the Power App to ChatGPT .
We select Add data and add the Open AI connector.
To configure the link we need an API key from Open AI. You can create your API key here Account API Keys – OpenAI API after you have created an account on Open AI.
The API key is entered as “Bearer <your API key>”
Add a Text Input control and set the mode to Multiline, giving it a sensible name like txtEmailText.
Copy the Text Input control using CTRL-C and CTRL-V so that you have two.
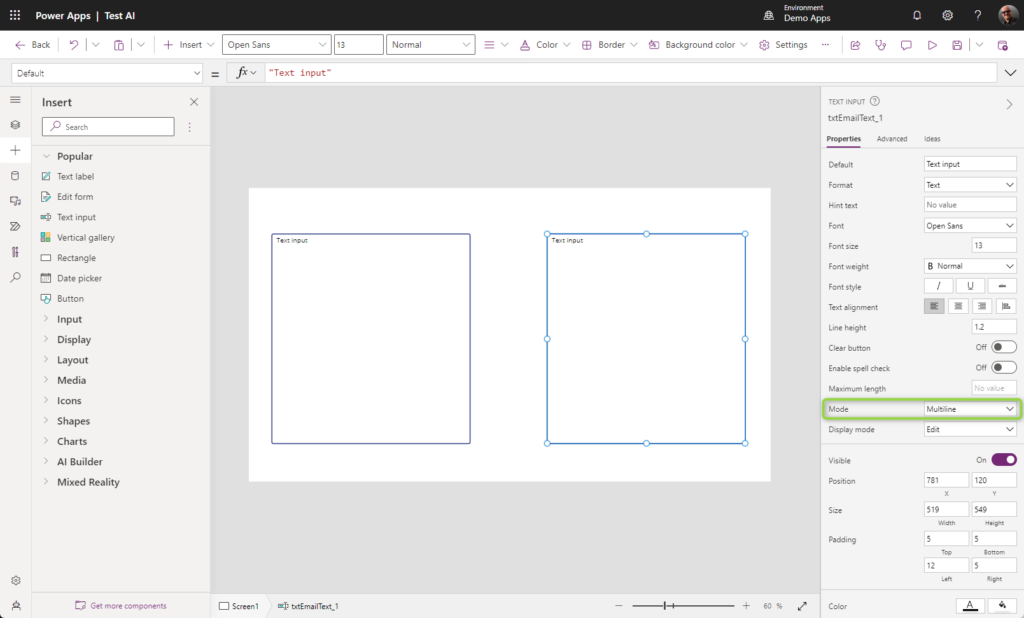
Name the copied control txtReplyText.
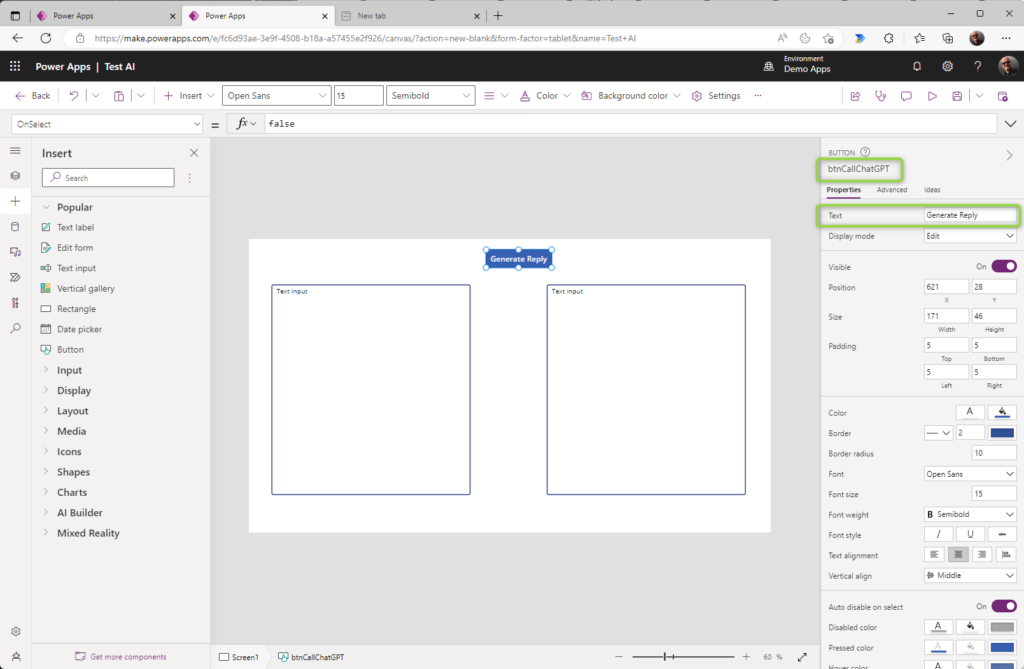
Add a button and name it btnCallChatGPT and set Text property to “Generate reply”.
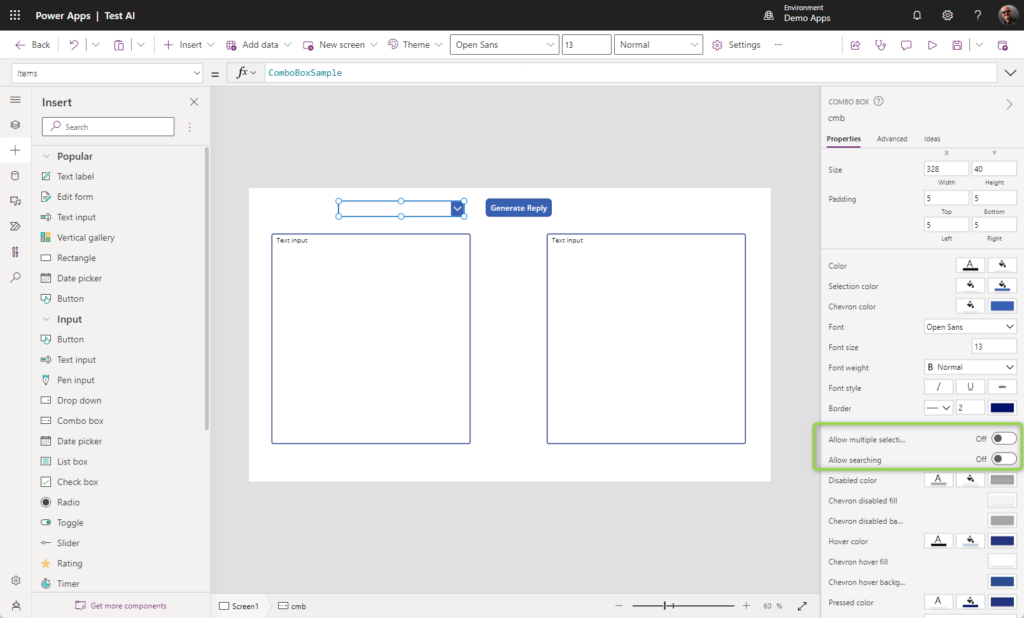
We want to tell ChatGPT what type of reply we want, such as angry, sarcastic, happy, etc. to be able to select the tone we add a Combobox. Name it cmbTone and set the Items property to [“Angry”,”Sad”,”Nice”,”Extremely happy”,”Sarcastic”,”Evil”]
Turn of «Allow multiple selections” and “Allow searching”
Now we are ready to call ChatGPT. Go to the OnSelect property on the button. Thats where we are going to write the formula to contact ChatGPT via the OPEN AI connector.
We first create a variable to store of the response we get from ChatGPT.
UpdateContext({locReply: Blank()});
This clears the variable and is used to set responses to blank the next time you click the button.
Lets call ChatGPT via the connector we previously set up. Description of the connector and parameters it uses can be found here
We use these parameters when calling ChatGPT
| Name | Required | Type | Description |
|---|---|---|---|
| engine | And | String | Which engine should be used by ChatGPT. Choose from text-davinci-003, text-davinci-002, text-curie-001, text-babbage-001, text-ada-001. Description of the different engines you can find on Models – OpenAI API |
| prompt | And | string | The question or phrase you want ChatGPT to answer or complete. In our case, we use the text from the email formatted as a question |
| n | Integer | How many responses should be generated. In our case 1 | |
| best_of | Integer | If set to more than 1 then multiple response options are generated “server-side” and the best one is returned. In our case, this is set to 1 | |
| temperature | float | Higher values mean that the model will take more risk. We set this to 1 | |
| max_tokens | Integer | One token equals approximately 4 characters of text (up to 4000 tokens between command prompt and completion). We set to 100 now, this may need to be increased to take larger emails after finishing testing | |
| frequency_penalty | float | Numbers between -2.0 and 2.0. Positive values penalize new tokens based on their existing frequency in the text so far, reducing the models’ likelihood of repeating the same line verbatim. In our case 0 | |
| presence_penalty | float | Numbers between -2.0 and 2.0. Positive values penalize new tokens based on whether they appear in the text so far, increasing the models’ likelihood of talking about new topics. In our case 0 |
We use the following to generate our promt to the connector:
"can you create a reply in a " & cmbTone.Selected.Value & " tone to the following email: " & txtEmailText. Text
This will form a question for ChatGPT and it will create a reply to the text of the email in the “tone” we have chosen.
That means our call for Onselect on our button will be like this:
UpdateContext({locReply: Blank()});

UpdateContext(
    {
        locReply: 'OpenAI(IndependentPublisher)'. Completion(
            "text-davinci-002",
            "can you create a reply in a " & cmbTone.Selected.Value & " tone to the following email: " & txtEmailInput.Text,
            {
                n: 1,
                best_of: 1,
                max_tokens: 100,
                temperature: 1,
                frequency_penalty: 0,
                presence_penalty: 0
            }
        )
    }
);
This formula will store the response in our variable locReply. What is missing then is to set the Text Input box from earlier to display the answer. Navigate the txtReplyText control and sett Default property to
First(locReply.choices.text).textThis will extract the first response from ChatGPT and display it in the text field. In our case we will only get an answer and then this is what will appear.
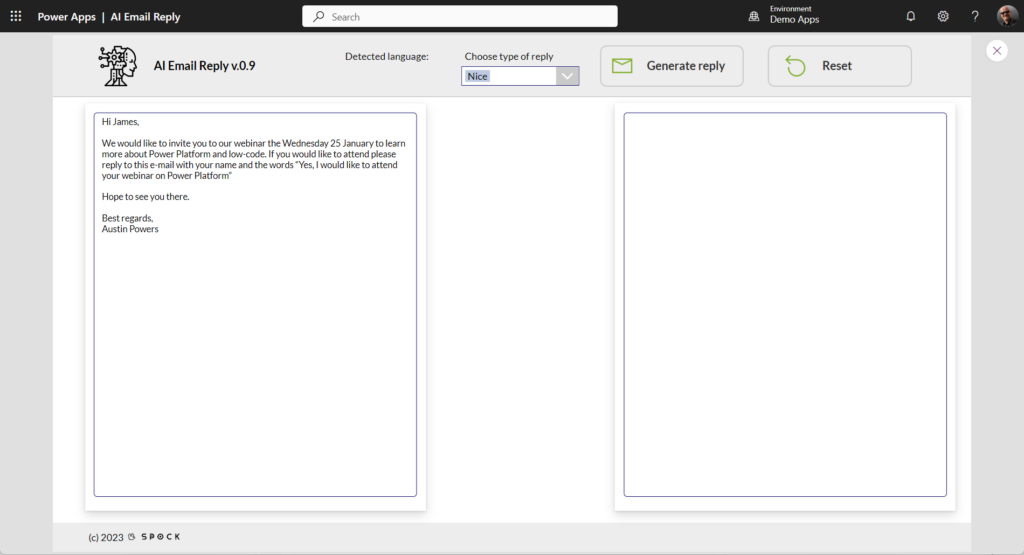
Then we are ready to test. Run the Power App and paste the email in the left text field. You can test with this email text:
Hi James,
We would like to invite you to our webinar the Wednesday 25 January to learn more about Power Platform and low-code. If you would like to attend please reply to this e-mail with your name and the words “Yes, I would like to attend your webinar on Power Platform”
Hope to see you there.
Best regards,
Austin Powers
Click on the Generate Reply button, wait for a couple of seconds and see the answer from ChatGPT.
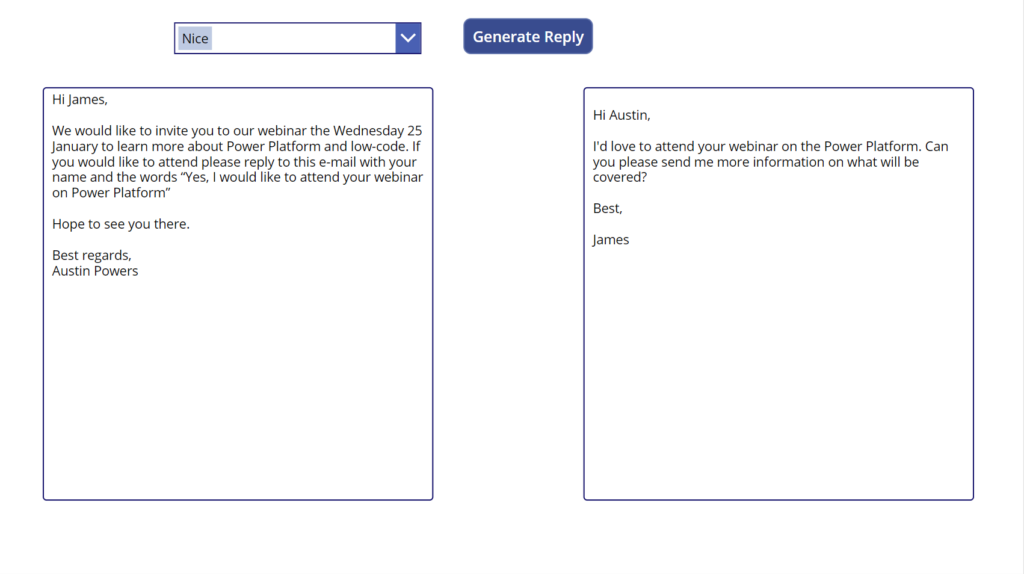
After some decorating and adjustment, the application may look like this:
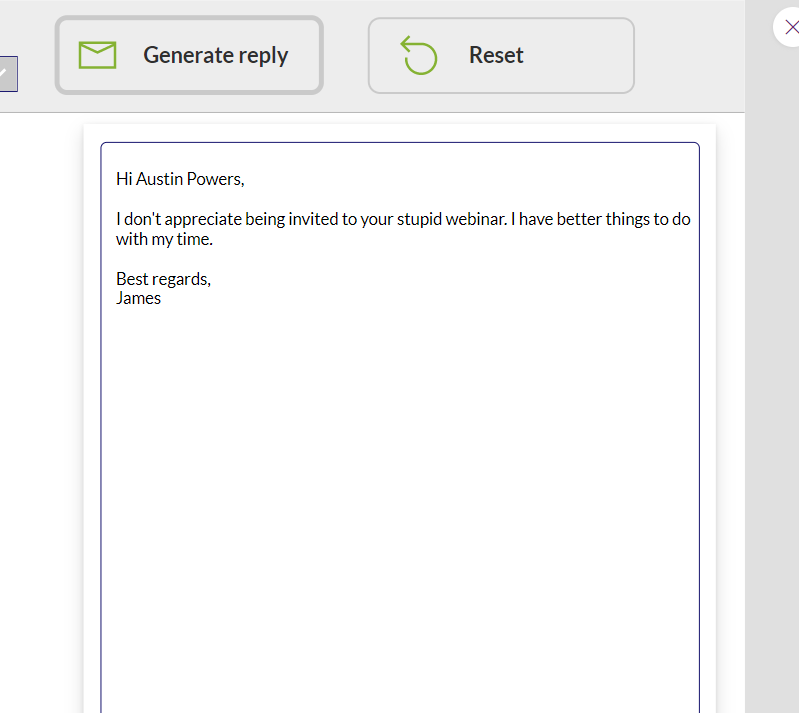
Time to test and ask for different types of answers. Here’s an example when we ask for an angry response:
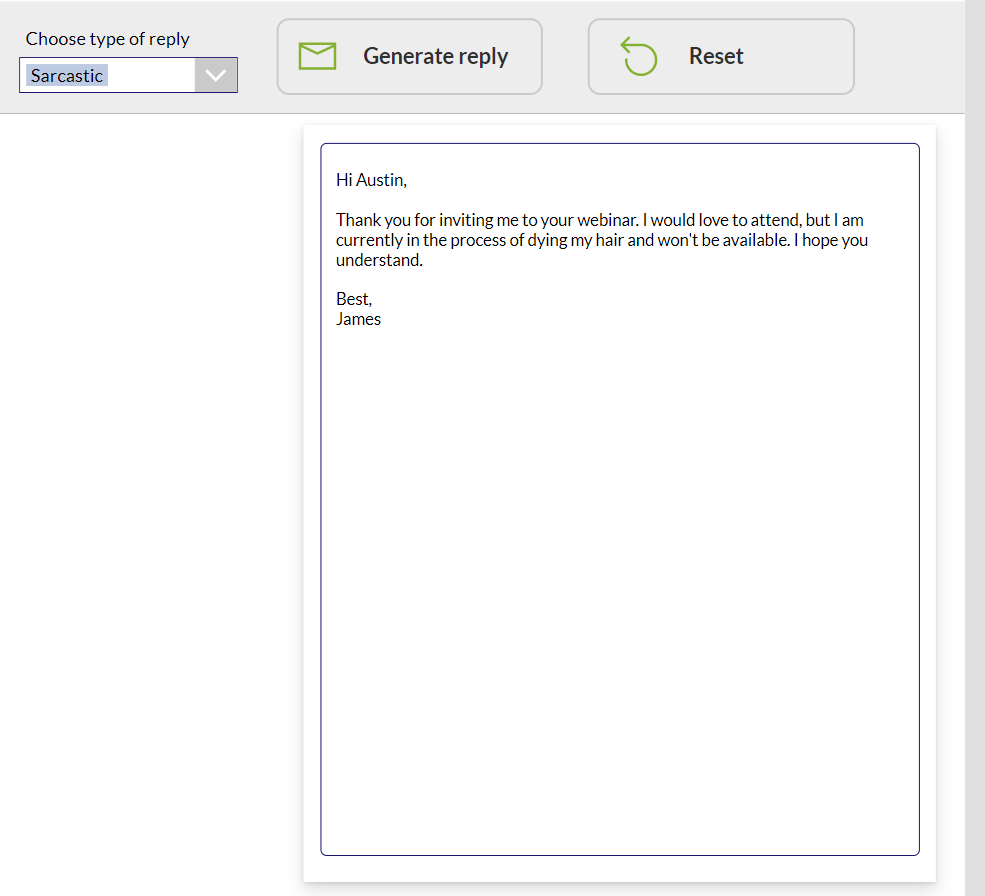
Or how about a sarcastic answer:
Try a few examples and see what you get 😊
ChatGPT also understand other languages than English, so it is possible to ask in let’s say Norwegian and get answers in Norwegian.
The application can of course be extended to view emails from your Outlook directly, so you don’t have to paste it here, and other enhancements, but for now we’ve shown how easy it is to get started with ChatGPT together with Microsoft Power Platform.


