

Introduction
Part 2 of this article describes how to make a feedback button and feedback for if Generative Orchestration is enabled
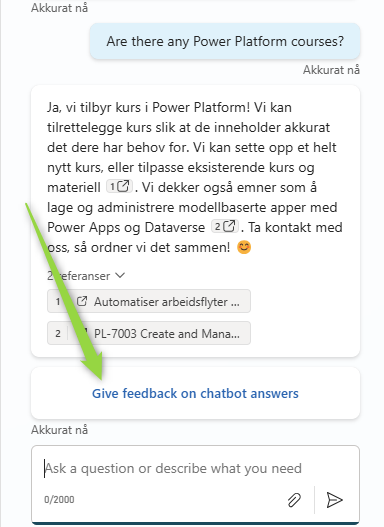
When you’ve already created an agent or chatbot with Microsoft Copilot Studio, you might want feedback from your users. Such feedback on responses generated by AI will be helpful in improving and adjusting the agent. We will change the agent so that users with the help of an adaptive card will have the opportunity to give feedback/comment on answers from generative AI if they wish. Each response from generative AI will have an adaptive card where we ask if the user wants to give feedback, if the user clicks on the link they will be directed to a new Topic where they can write their feedback. If they don’t want to give feedback, they can just ignore the message.
So, let’s see how we can achieve this. First, we make a small adjustment in the Conversational boosting topic.
Change conversational boosting
Navigate to Topics, select system, and find Conversational boosting topic. We will make a small change to the “Create generative answers” node here. Select properties on the “Create generative answers” node.
Go to the bottom of the property panel under advanced and remove the check mark on the “Send a message” checkbox and select Complete (recommended) in the “Save LLM response” dropdown.
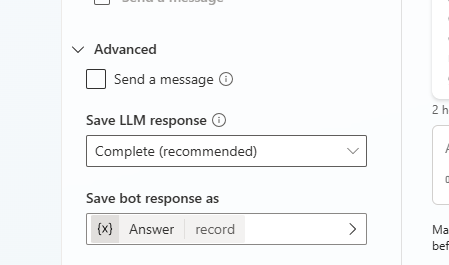
This will store the entire response of generative AI in a variable called Answer. This is of type record and will contain several properties we can use.
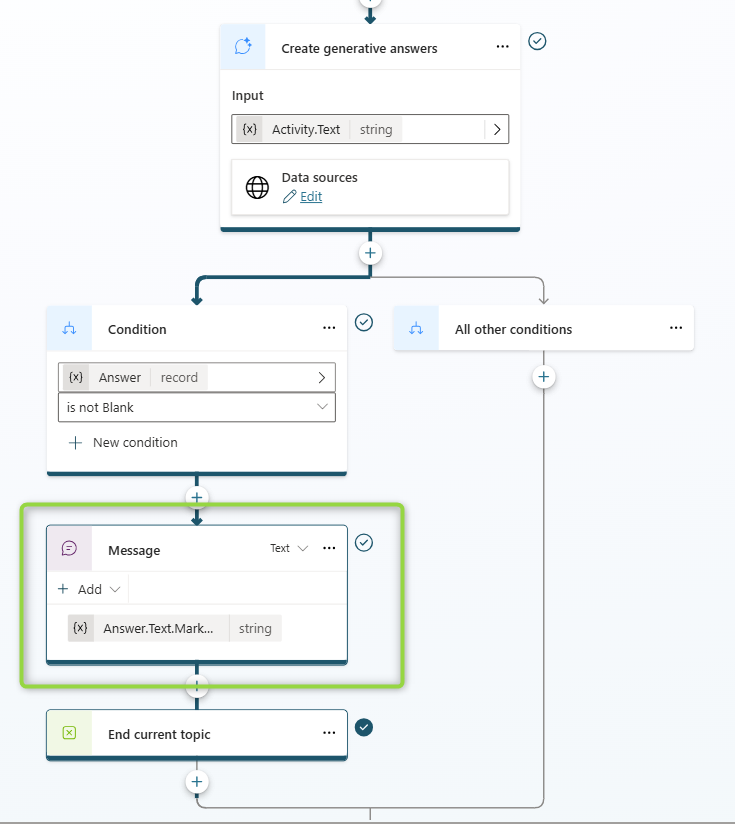
After this change, the agent will not show the response to us until we choose to show it to the user. We are now doing this by adding a node under the condition node in the “Conversational boosting” topic.
Click on the plus sign and select “Send a message”, in the “Send a message” node we add the Answer variable from the “Create generative answer” node. The property we use is Answer.Text.MarkdownContent, this will show the entire answer from generative answers.
Next add an adaptive card on this “Message” node, it will be our “Do you want to give a feedback on the chatbot” button.
Click add in the “Message” node and select “Adaptive card” in properties on the “adaptive card” node.
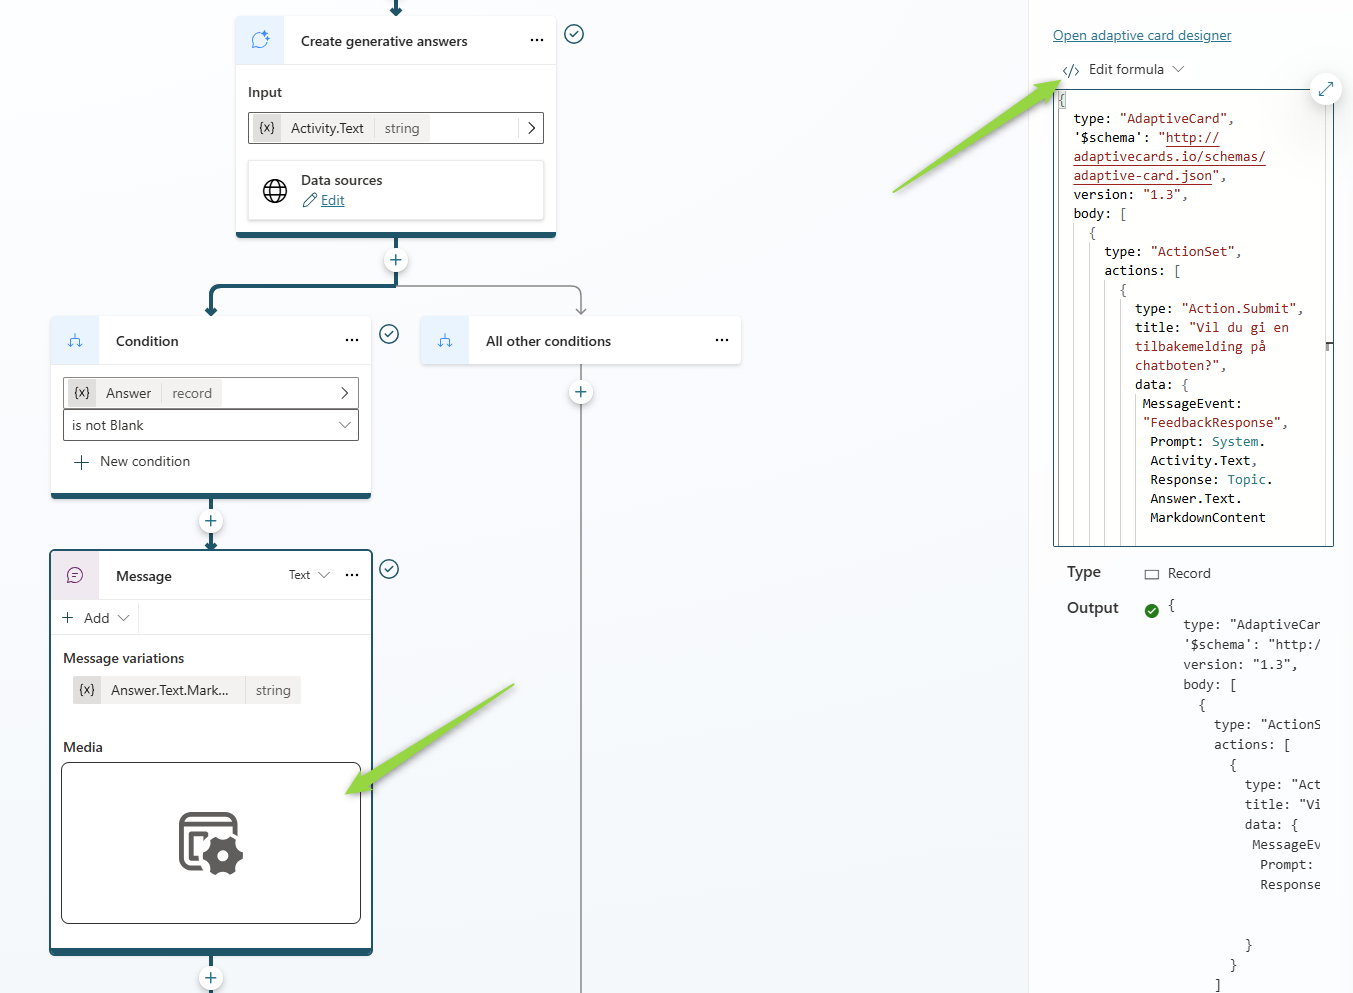
In “Adaptive card properties”, select “Edit formula” and paste the following adaptive card:
{
type: "AdaptiveCard",
'$schema': "http://adaptivecards.io/schemas/adaptive-card.json",
version: "1.3",
Body: [
{
type: "ActionSet",
actions: [
{
type: "Action.Submit",
title: "Would you like to give feedback on the chatbot?",
data: {
MessageEvent: "FeedbackResponse",
Prompt: System.Activity.Text,
Response: Topic.Answer.Text.MarkdownContent

}
}
]
}
]
}
This adaptive card shows a link with the text “Do you want to give feedback on the chatbot?” when the user clicks on the link, a MessageEvent named “FeedbackResponse” is sent, this contains the user’s question in the “Prompt” property and generative AI’s response in the “Response” property
Create Feedback topic
We have now created the link that the user can click on to give feedback on the chatbot. Now we will create a new topic or topic where the user will get a dialog box they can write their feedback in.
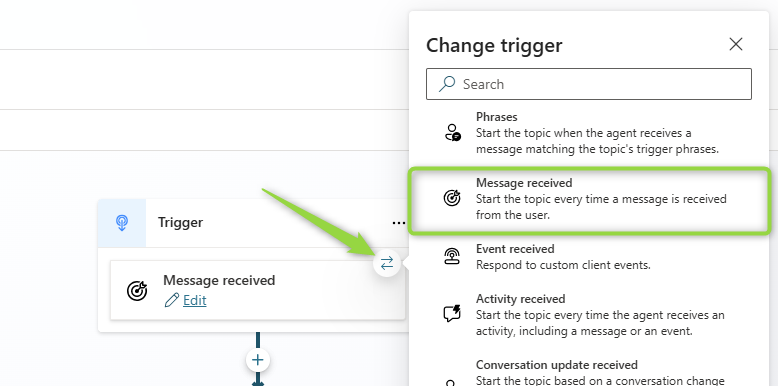
Create a new topic manually and name it “Feedback.” In order for this topic to be triggered, we need to change the trigger to “message received”. Click on the symbol with the arrows and change the trigger to “message received”. Now you have a topic that will trigger on all messages sent from the user, we want to filter so that this topic is only triggered when they click on our “Do you want to give feedback on the chatbot?” link.
Click Edit on the “message received” trigger, select the “activity type” Message, set Condition to Formula and enter the following PowerFX script on “Function”:
! IsBlank(System.Activity.Value.MessageEvent) && Text(System.Activity.Value.MessageEvent) = "FeedbackResponse"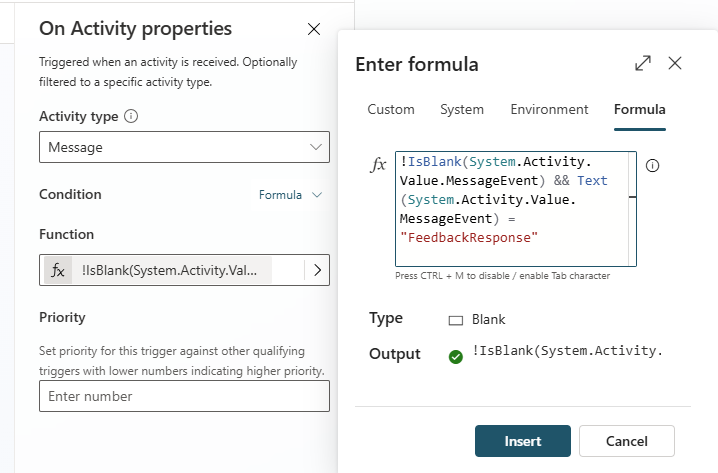
This means that this topic is only triggered when the user clicks on our link that sends a MessageEvent named “FeedbackResponse”.
Add a new node, select “Parse value” under “Variable management”
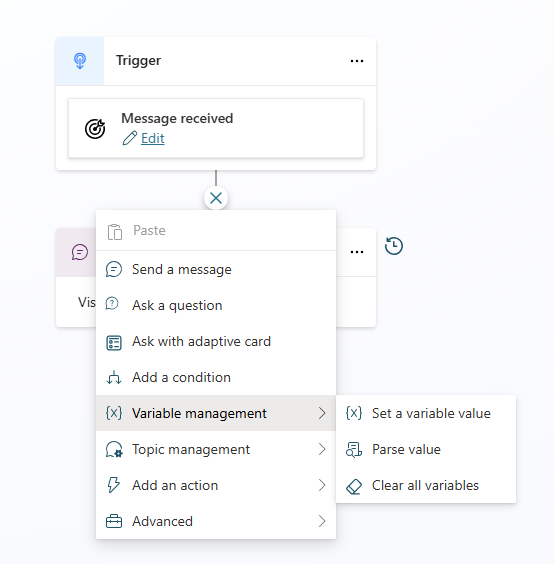
Here we will “parse” the system variable “Activity.Value”, it will contain the entire message we sent from our “Would you like to give a feedback on the chatbot?” link, the question the user asked and the answer generative AI gave.
In “Parse Value”, select “Activity.Value” under system and in Data type, select “from sample data”. Select “Get schema from sample JSON” and paste the following JSON:
{
"MessageEvent": "MyFeedback";
"Prompt": "my prompt";
"Response": "Response from generative AI"

}
In “Save as”, insert a new variable, call this VarFeedback. We can use this later so that we can see what questions and answers the user is giving feedback on.
Then add another node of type “Ask with adaptive card”. Paste the following adaptive card JSON:
{
"type": "AdaptiveCard",
'$schema': 'http://adaptivecards.io/schemas/adaptive-card.json';
"version": "1.3",
"body": [
{
"type": "TextBlock",
"text": "feedback";
"size": "large",
"wrap": true,
"weight": "Bolder"

},
{
"type": "Input.Text",
"placeholder": "Post your feedback comments here",
"isMultiline": true,
"id": "12",
"height": "stretch"
}
],
"Actions": [
{
"type": "Action.Submit",
"title": "Send feedback",
"associatedInputs": "auto",
"id": "11"
}
]
}
This will provide users with a text box where they can write their feedback. Create a new variable for the output and call it VarUsersFeedback.
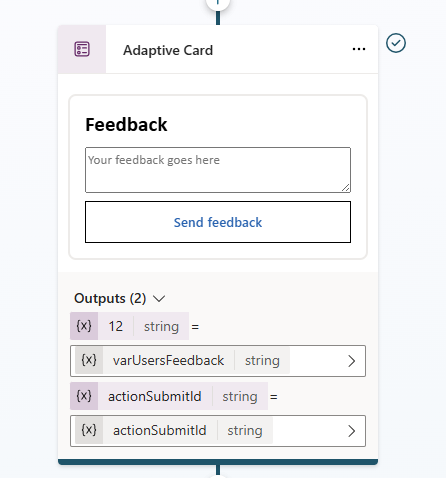
This variable will contain what the user writes in the feedback box.
Summary
Now we’ve created an adaptive card with a link that says “Would you like to give feedback on the chatbot?” that pops up every time generative AI answers a question. The user can choose to click on the link to post a feedback or choose not to.
If the user clicks on the link, the user is shown an adaptive card where it is possible to enter feedback and click send.
In this article, we have not used this information for anything yet, but here you are free to save the information where you want. For example, you can store your feedback in Dataverse using Power Automate, or you can send the information to Azure Application Insights for further analysis.
For now, we’re just adding a node to print the information in chat so you can see that everything is working as intended.
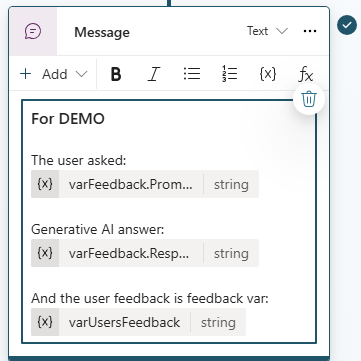
After the feedback adaptive card, add a node of type “Send a message”. In it, we print the variables “VarFeedback.Prompt” and “VarFeedback.Response”, which contain the question the user asked and answered generative AI.
In addition, we print “VarUsersFeedback” which will be the feedback the user gave.
If you now save a topic and run a test, you will see that we have created a solution where the user can give feedback in an easy way if they want.
Note: this way to collect user feedback will work when the setting for Generative AI is set to classic.
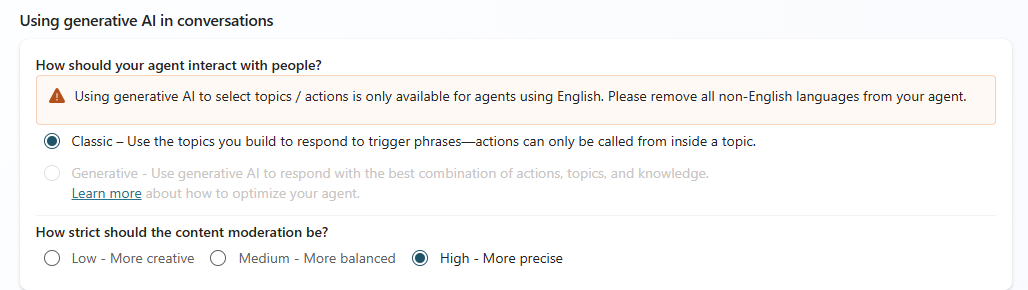
Generative orchestration is not yet available in Norwegian, and most of the agents I build are Norwegian. If your language supports Generative then the process to add a feedback adaptive card for users is a little bit different. I will cover that in a later blog post.
Customize Copilot and Create Agents | Microsoft Copilot Studio
Topics in Copilot Studio – Microsoft Copilot Studio | Microsoft Learn