
For those of us that have stopped printing it can of course be used for generating a Word or PDF document without printing it ![]()
Microsoft recently released the Word Online Connector to Flow. The connector have two actions. “Convert Word Document to PDF” and “Populate a Microsoft Word template”.
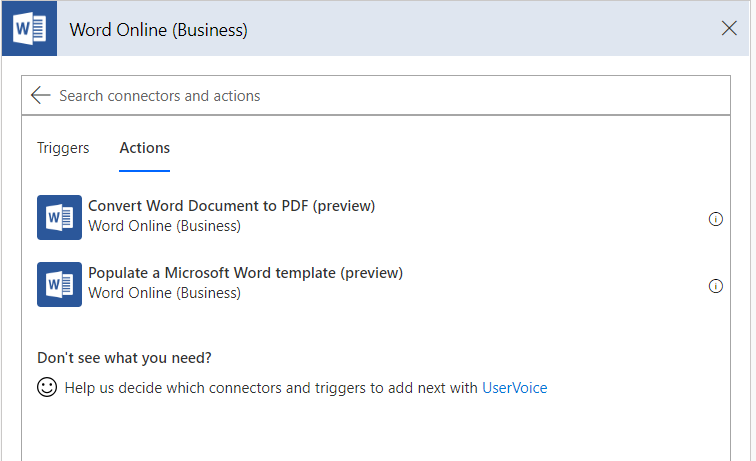
The “Convert Word Document to PDF” action does exactly what the description says, it converts a document to PDF ![]() . I wanted to have a closer look at the other action, “Populate a Microsoft Word template”. Because if that does what the subscription says I was thinking this could be used to create nice printouts from SharePoint lists.
. I wanted to have a closer look at the other action, “Populate a Microsoft Word template”. Because if that does what the subscription says I was thinking this could be used to create nice printouts from SharePoint lists.
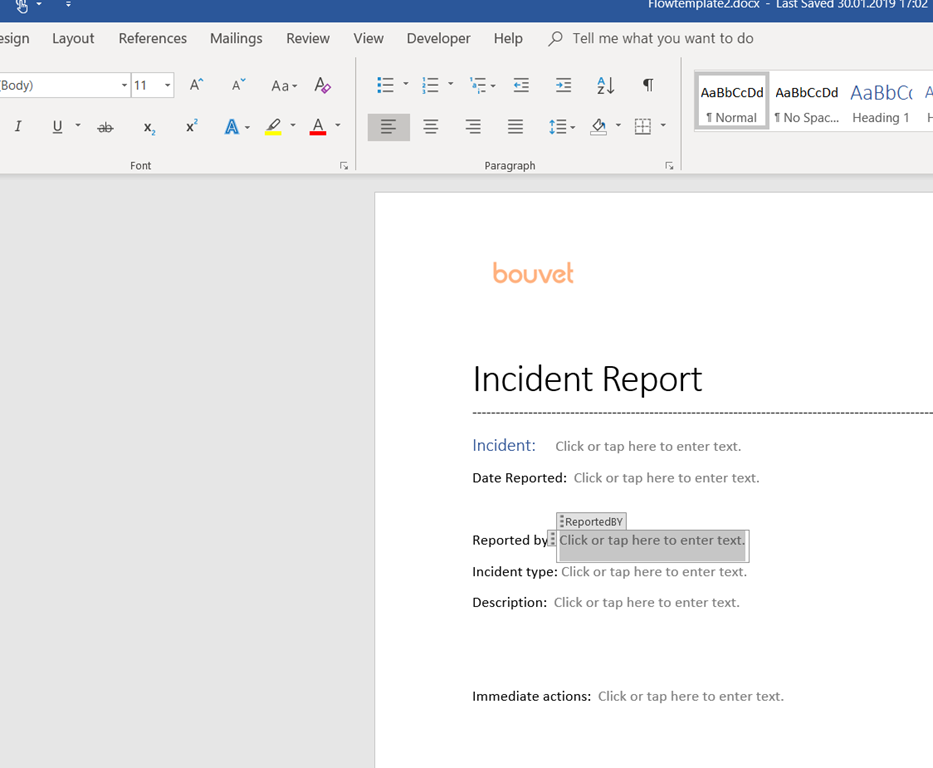
I started by creating a simple word document to be used as my template. I enabled the developer tab in Word to be able to add controls to my Word Template. Check this link for how to enable the developer tab in Word.
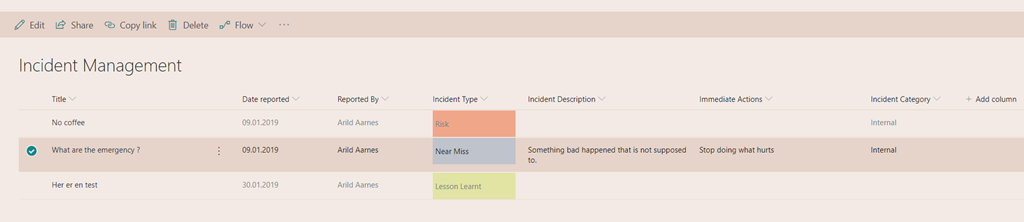
My plan was to create a printout via Word of my Incident Management list, see picture.
So I created a simple Word document and put in text controls from the developer tab where I want the columns from the SharePoint list to be put.
I then save the file as a Word document in a document library on a SharePoint site. Any SharePoint Online document library will do just fine.
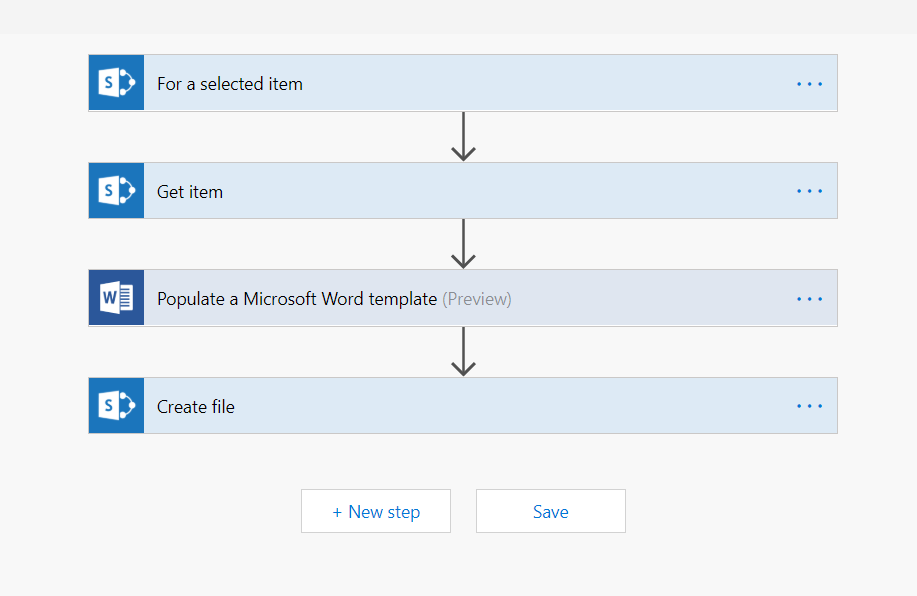
Then head over to Flow to create a Flow. Create a new blank Flow and find the SharePoint Connector.
 Select the “For a selected item” trigger as a starting point for the Flow.This will make our Flow available from the Flow menu in our Incident Management list.

Next configure the trigger to point to our Incident Management list, that meant putting in the URL to my Incident Management site in the Site Name field (or selecting the site from the list) and selecting the Incident Management list from the List Name dropdown.
Next add the SharePoint connector again and add the Get Item action. This will get the actual columns from the item that triggered the Flow.Again put in the URL to the Incident Management site and select the Incident Management list from the List Name dropdown.
For the ID field pick the ID from the Selected Item action.

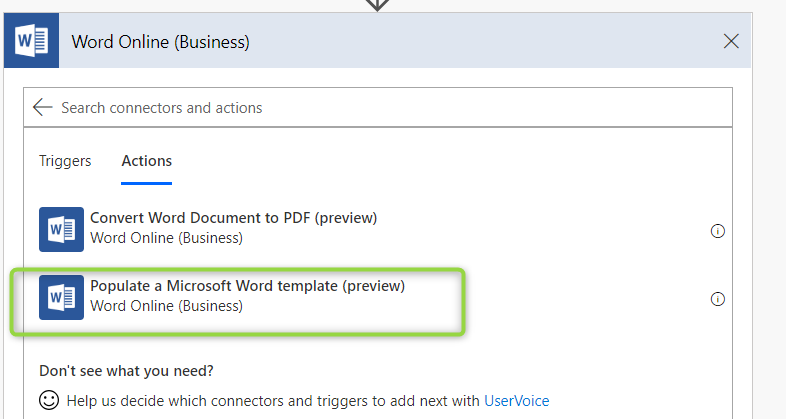
The add a new action. This time search for Word and the Word Online (Business) connector should show up.

Click this and then add the Populate a Microsoft Word Template action.
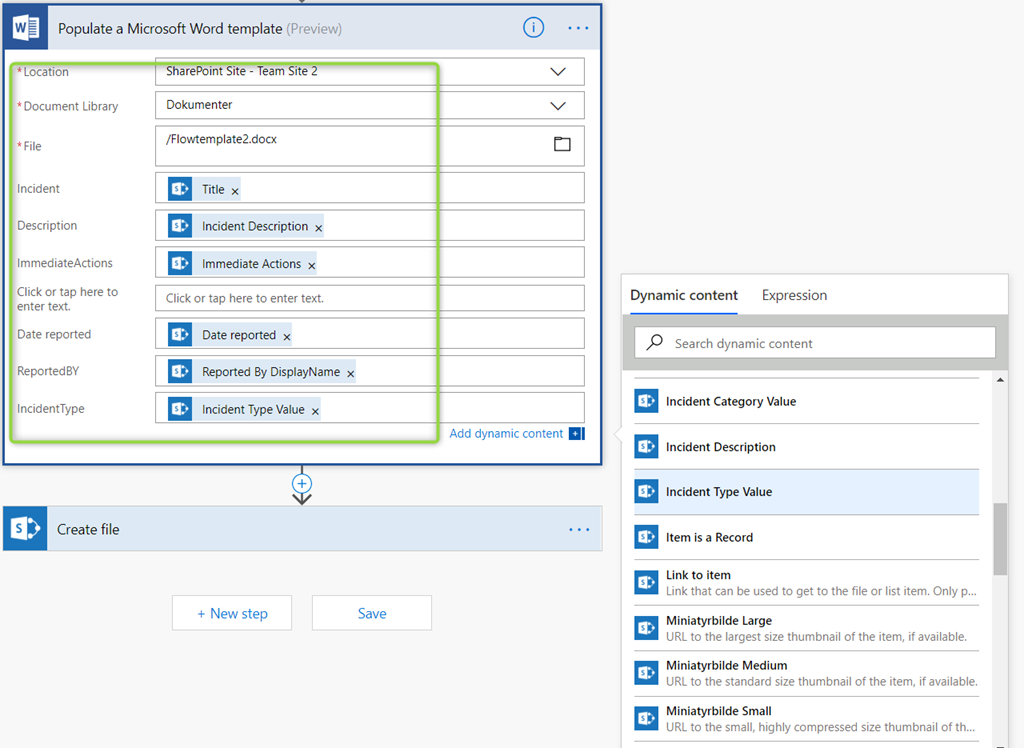
Configure this to point at the Word document we created earlier.The Location field points to the SharePoint site where the Word template is stored, select the document library in the Document Library dropdown and the select the template file in the File dropdown. I created my Word template as a regular Word document DOCX and not a Word template a DOCT extension. Only DOCX files showed up in the File dropdown here.
When you have selected your template all the text controls you added to the template should show up here.
And no you can just map the columns from the SharePoint list item to the corresponding control in the Word Template.
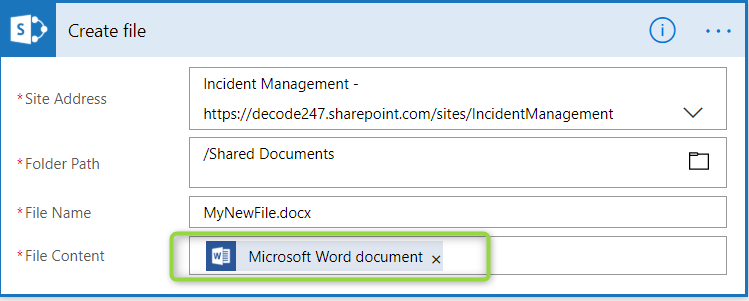
The last action we will add is from the SharePoint connector again and its the Create File action. This will create our new Word Document with data from the selected SharePoint item and based on the Word Template we provided.
Point it to a document library on any site where you want the new document stored.and provide a new file name. For the File Content field, pout in the Word document created by our last action.
That’s it, save your Flow and we are ready for a test.
This is what the complete Flow looks like

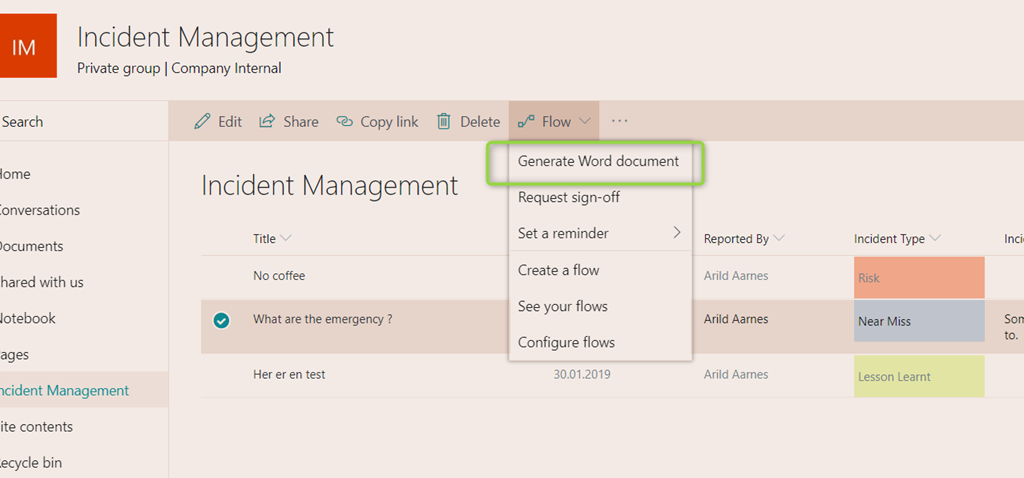
From the Incident Management list we can now select an item and start the Flow. I named my flow “Generate Word Document” and will find it in the Flow menu when an item is selected in the list.
When you run this flow a Word document should be created in the document library you specified in the Flow.
This is the Document I created based on a Word template and content from a SharePoint list. Ready to print.

Conclusion
Using the new Word Online connector in Flow you can quickly create a nice looking printing solution for a SharePoint list. Using the Convert to PDF action of the connector we could just as easily create PDF’s form SharePoint list items.
By using the Get Items action of the SharePoint connector we could loop through all items in a SharePoint list and create a PDF report, or create a document for print for those still using paper ![]()
The only downside I can see is that the Word Online connector is a Premium Connector, that means you would need a Flow Plan 1 or Plan 2 to use it so there is a licensing cost involved.