
If you are the lucky owner of Microsoft Sharepoint Portal 2010 Enterprise version you can easily replace the built in list forms with your own forms designed in Microsoft Infopath.
Microsoft Infopath is Microsoft’s form creating client, you can read more about Microsoft Infopath here.
Background
The built-in form of a Sharepoint list is not very flexible and do not provide advanced features like hiding fields when they are not needed or dividing a form into several pages if it’s a large form, and it’s difficult to display a form in 2 or more columns. So if your form contains a lot of fields it will be very long and not very user friendly.
This is where Microsoft Infopath comes to your rescue if you are the owner of the Enterprise version of Sharepoint 2010. With Infopath you can easily create complex forms with several columns, divided into several pages (or views) and with fields that are hidden until needed.
In this Part 1 of this article I will provide a small step-by-step guide to replacing the built-in form of a Task list with a little bit more sophisticated form created with Microsoft Infopath.
The Built-in Task list form
Create a standard Task list in a Sharepoint site and you should get a list similar to this image.
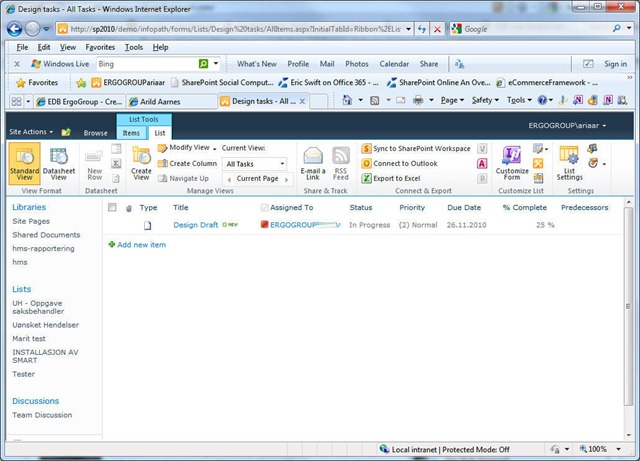
Then click the Add New Item link in this list and your list form should look like this. 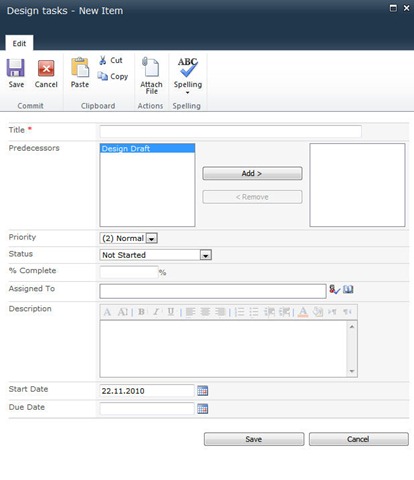
This is the List form we will replace with a little bit more advanced Infopath form.
Edit the form in Infopath
To be able to edit this form in Infopath two things need to be in place. Number one: you need the Enterprise version of Sharepoint 2010. Number two: you need the Microsoft Infopath client installed on your PC. The InfoPath client is included when you install Microsoft Office 2010 Professional Plus. Only the person creating the new form needs the Infopath client, all other users will fill in the form in there web browser.
To edit the form click the Customize Form button in the ribbon toolbar for the list. See image below. 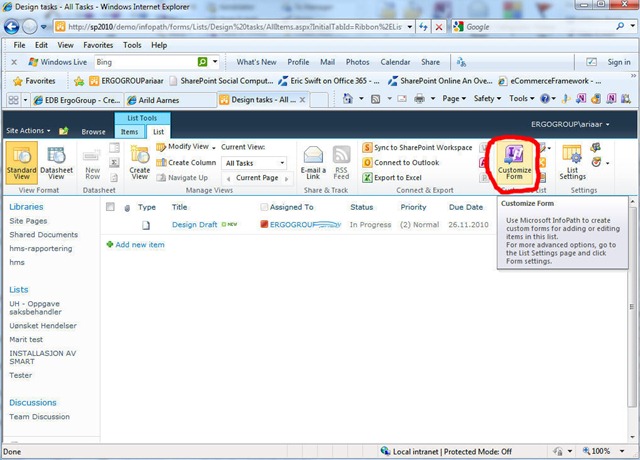
This will open up the form in the Microsoft Infopath client with all the fields from the list already in place. 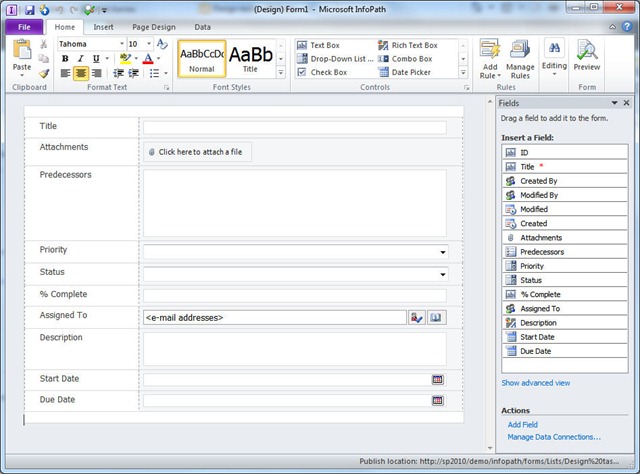
You can now start editing the form and Infopath provides you with a good set of tools to do this.
for this small demo we will add a picture, create some descriptive text to fields and add some fields that are hidden until needed.
First we add a logo at the top of the form by clicking the Picture button on the Insert ribbon in Infopath. Browse and select a picture from your computer.
Next we insert some descriptive text below the Description field in the middle of the form. Click to select the table row with the Description field and then right click, click Insert in the dropdown menu and select Row Below. this should insert and empty row below the description field. Click in this row and type some descriptive text.
As you can see it’s quite easy to add pictures and descriptive text to make a form more user friendly.
Last we will insert some new fields at the bottom of the form and these fields will be hidden until the users needs them.
Click at the bottom of the form to place your marker and then on the Home tab of the ribbon in Infopath in the controls section you should find a control named Section, click this to insert a Section at the bottom of the form. 
This Section will be the placeholder for our hidden fields.
We need to set a few properties on this Section so right Click the inserted Section an select Section Properties.
In the Section Properties dialog select “Do not include section in the form by default” and “Allow users to insert the section”
Then select “Show insert button and hint text” and write “More Information” in the text field. 
Click Ok to close the Section Properties dialog.
Next we will insert a couple of new fields into this hidden section.
Select the Insert tab on the ribbon in InfoPath and insert a table from the tables section. I inserted “Two-column with Emphasis 2” for this demo. This is just to line up the new fields with the existing fields in the form.
then we will insert the new fields.Look in the Fields toolpane on the right of the InfoPath client, close to the bottom you will see “Add Field” 
Click “Add Field” to insert a new field. This will create the fields in the form and in the existing Sharepoint List when we publish the form back to Sharepoint.
Create any fields you like here, give it a display name and select the Data Type for the fields. The Data Types available are the same as when creating new fields in the Sharepoint web interface.
For this demo I created the following fields.
| Display Name | Data type |
| More Information | Multiple lines of text (rich text) |
| Software | Choice (click the Edit Choices button to add choices) |
| SLA | Yes/No |
Your form should now look similar to the following image: 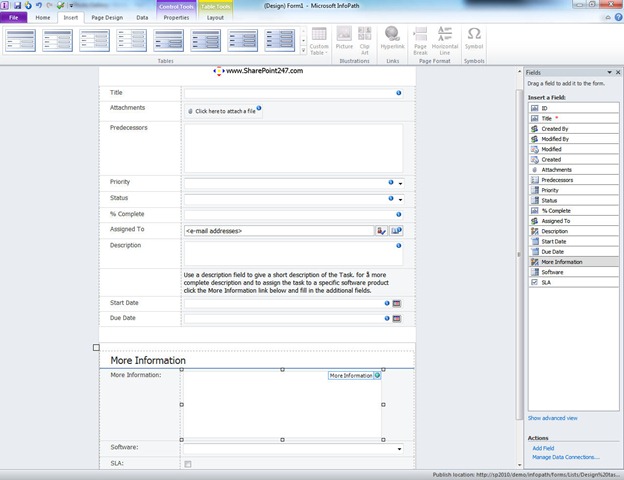
If you are happy with your form you are now ready to publish this form to the original Sharepoint List to replace the built-in form for this Task List.
To publish the form all you have to do is click the “Quick Publish” button in Infopath. This is located in the top left toolbar in Infopath. 
And that’s it, you have now replaced the built-in task list form with your own form from Infopath.
Test the Form
to test your new form use your web browser and navigate to the Task list we replaced the form for. Once in the task list click “Add New Item” and your new form should be displayed. 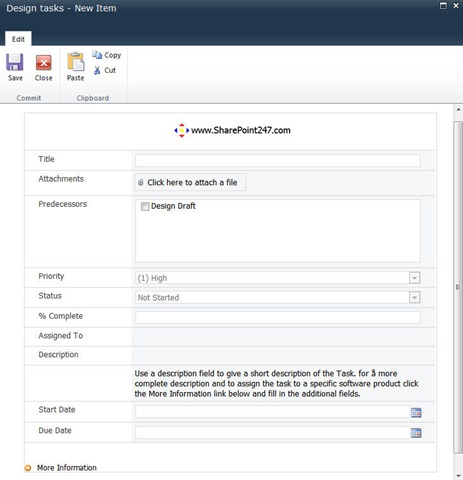
As you can see our new field are hidden but if you click the “More information” link they will be displayed. 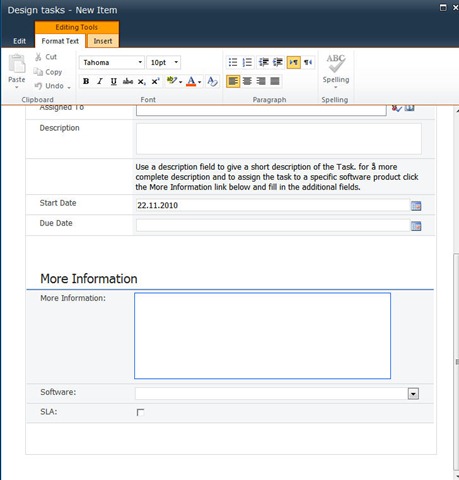
Summary
Microsoft Infopath can be used to easily replace built in Sharepoint List forms with more complex forms. This functionality is only available on the Enterprise version of Sharepoint 2010.
I will publish a part 2 of this article in the near future where we will create a more advanced form using Infopath Rules and also dived the form into several pages or Views.
Do the users that use the customised list forms require ECAL?
Yes, I do believe the use of Infopath form as list forms require a Enterprise CAL. Here are an blog that describes the licensing in more detail. http://blog.sharepointelearning.com/licensing-requirements-for-infopath-forms-on-sharepoint/
Thanks for this Arild.
I’ve been using this feature for some time now and I’m starting to get much more adventurous.
I’ve never needed to go go back and restore the forms to their original states until now.
Do I just have to use the copy of the default .xsn file that I took before I started my mods or is their a way to ‘undo’ and replace all my changes with the original forms using the SharePoint UI?
When’s part 2 gonna be ready to read?
Hi, You can get back the original Sharepoint form by going to List Settings – Form Settings and select “Use the default Sharepoint form”
If you choose to Not delete the Infopath form Infopath will use this the next time you click Customize Form on this list.
Part to is hopefully coming in a week or two. I’ve been way to busy lately.