One of the most exiting new features of Sharepoint 2010 must be the Business Connectivity Services. You can use this to access and surface data from backend systems. You can access Line of Business (LOB) systems and read, update, create and delete data.
And best of all you can do all of this for free as it is included with Sharepoint 2010 Foundation as well.
So let’s see how we can configure this to use some data in a Sharepoint site.
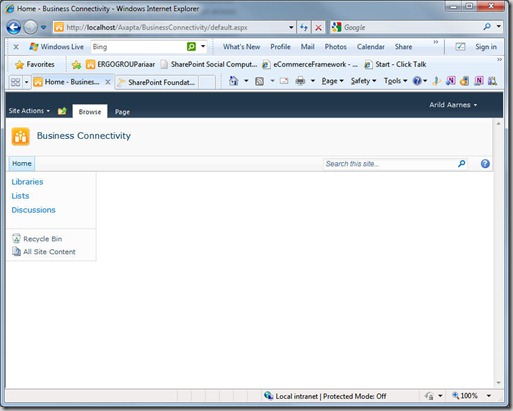
First we will create a empty site in Sharepoint 2010 Foundation. We will name this site Business Connectivity.
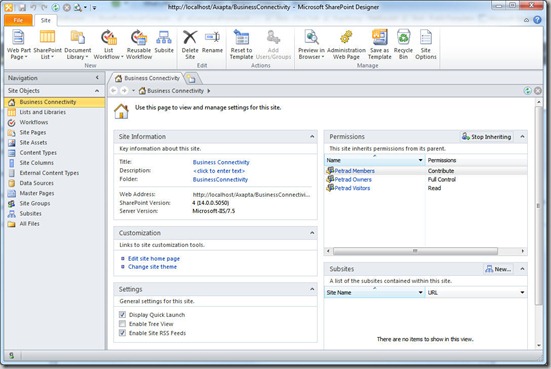
Next you need to open this site in Sharepoint Designer 2010. You can download that here.
To open your site in Sharepoint designer select Site Actions > Edit in Sharepoint Designer
Sharepoint Designer should now open with your site and you will see an opening screen like the following picture with information from your site.
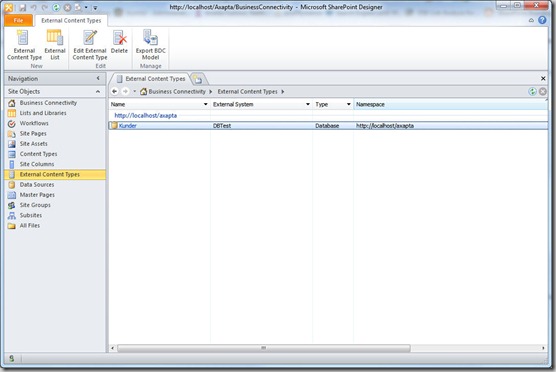
In this demo we will connect to a small SQL database I have created with a small customers table contains a few fields. To do this we will go to External Content Types in the left navigation Pane in Sharepoint Designer.
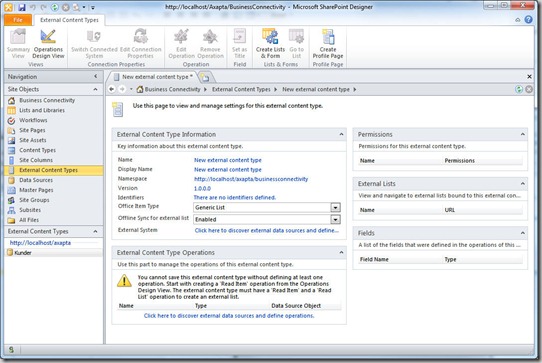
Then click External Content Type on the ribbon menu to create our new Content type for external data.
We will leave much of this at it’s default settings for this demo but will give it a more descriptive name, so click the name filed and give it a new name, I will call mine MyCustomers and then click the text beside External Systems, this will bring up the Data Connections view and we will use this to tell Sharepoint where to connect to get our data. In this case a SQL server Database.
Click the Add Connection button to add a data connection.
For this demo select SQL Server and click OK. the other choices available here are .NET Type and WCF Service.
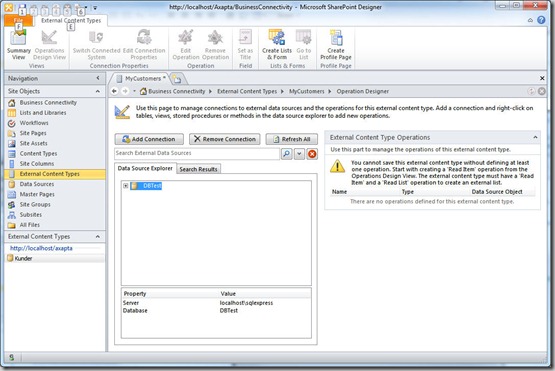
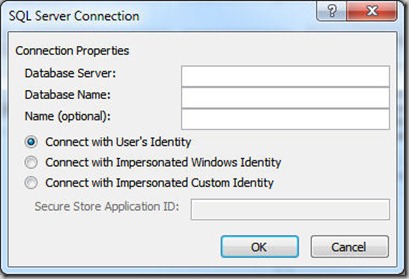
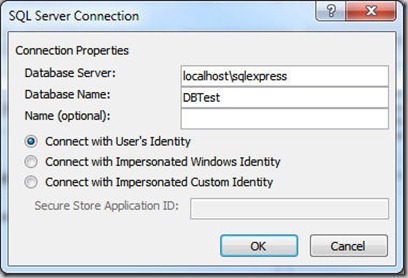
In this dialog box we will enter information about our SQL server and the database we are connecting to. Leave the option button to “Connect with User’s Identity” as the others require a Secure Store ID and this is only available on Sharepoint Portal not Sharepoint Foundation.
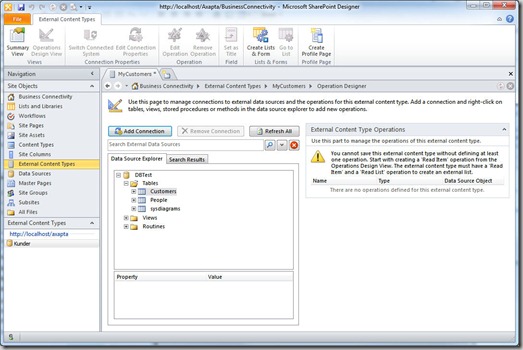
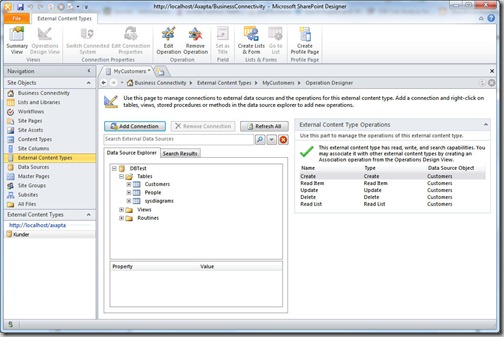
Enter your information and click OK. You should then see the following picture.
This will show you the database we selected and all the tables and views we have permissions on. For this demo we will select the Customers table.
Right click the Customers table and you will see all the methods we can create for this table. For this demo we will go ahead and create all operations so select “Create All Operations”.
We could have limited our choices to only read operations here if that was all we needed.
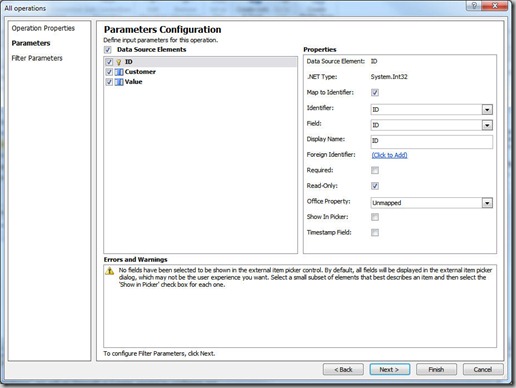
After clicking “Create All Operations” we will go through a 3 page wizard to configure our choices. Here you can:
- Set Operation Properties
- Set Parameters – Set the field from the database that will show in the external item picker control in Sharepoint. By default all fields are show in the control and that’s usually not what you want to show your users. For this demo we select the Customers field.
- Filter Parameters – use to narrow your result set
Click the Finish button when you are done and you should get the following picture showing the Operations you configured for this connection.
Click the save icon at the top left corner of Sharepoint Designer 2010 to save your External Content Type.
Before you use this External Content Type in Sharepoint we need to set user permissions on the External Content Type using Sharepoint Central Administration.
Start Sharepoint Central Administration.
Navigate to “Manage Service Applications” under the “Application Management” section
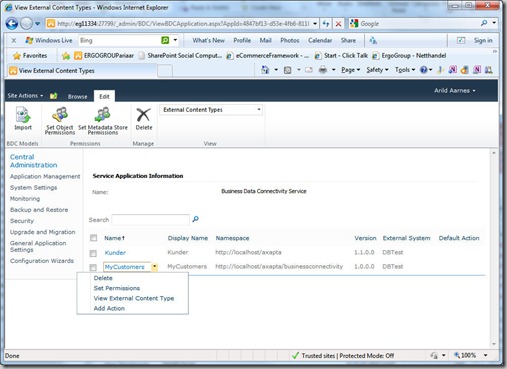
Click the “Business Data Connectivity Services” link
Here you will find the External Content Type MyCustomers that we just created. Click the dropdown menu for this and select “set permissions”
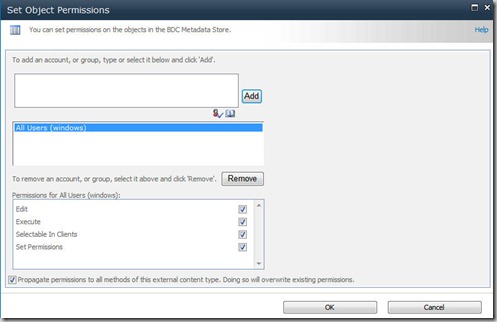
For this demo I’ve given All Users permission on this one. See picture below. Click Ok when done.
That’s it. You can close Sharepoint central Administration now and we will go to our Sharepoint site and consume the data from the connection we just made.
Consume External Data in Sharepoint
Navigate to the home page of the site we created earlier. Click the “Site Actions” menu and then click “More Options”
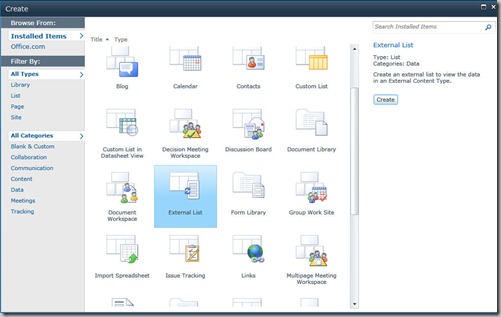
On the screen that appears we are looking for the item called External List, this is the one we will use to connect to our External Content Type.
Select “External List” and click “Create”
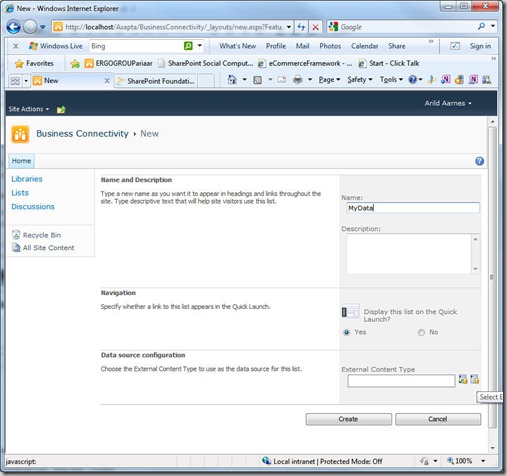
Give your list a name, I’m naming mine “Mydata” and then click the icon to the far right from the External Content Type box.
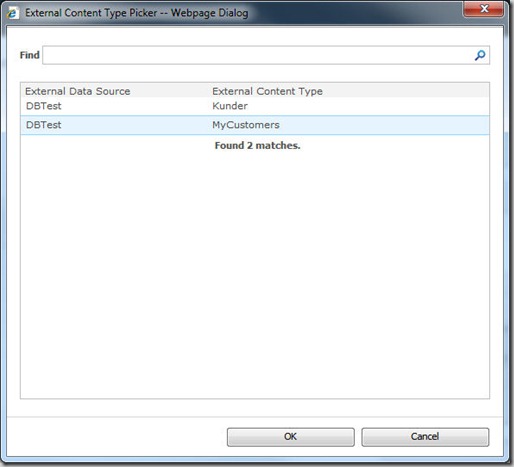
Select the External Content Type we created earlier, MyCustomers, and click OK. Then click the “Create” button and your done.
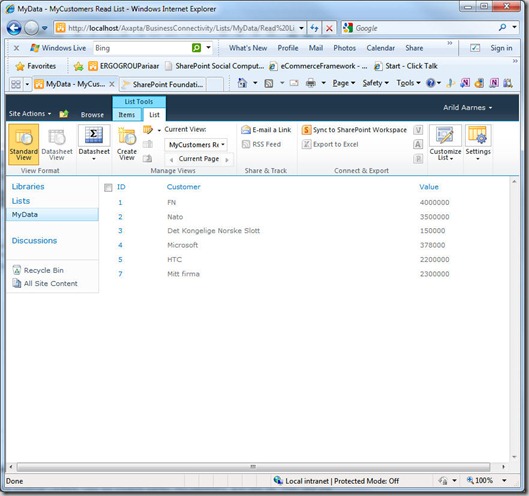
That’s it, you should now have a list in your sharepoint site with your external data.
You can use this list for a Lookup field in anther list, you can edit items, add items and delete items and it all gets instantly updated in the backend system, in this case our SQL database.
Summary
This blog article is just a simple example of what is possible using Sharepoint 2010 Foundation and Sharepoint Designer 2010, both free to download from Microsoft.
For more details of Sharepoint and the Business Connectivity Services check out these links.
Exploring Business Connectivity Services (BCS) in SharePoint Foundation 2010
Business Connectivity Services overview (SharePoint Foundation 2010)

